


Hello coders! In this article we learn, how to integrate Laravel login with Twitter.
Firstly, we will learn how to create an app at twitter. Secondly we will code for implement it with Laravel authentication.
Most importantly, we have to stick with the same code and process atleast for this demo to run successfully, after that you can modify it as per need.
Setup and implement Twitter App for twitter login.
First go to twitter developer account.
You will see bellow page where i am trying this in August 2020 so it might differ in future.
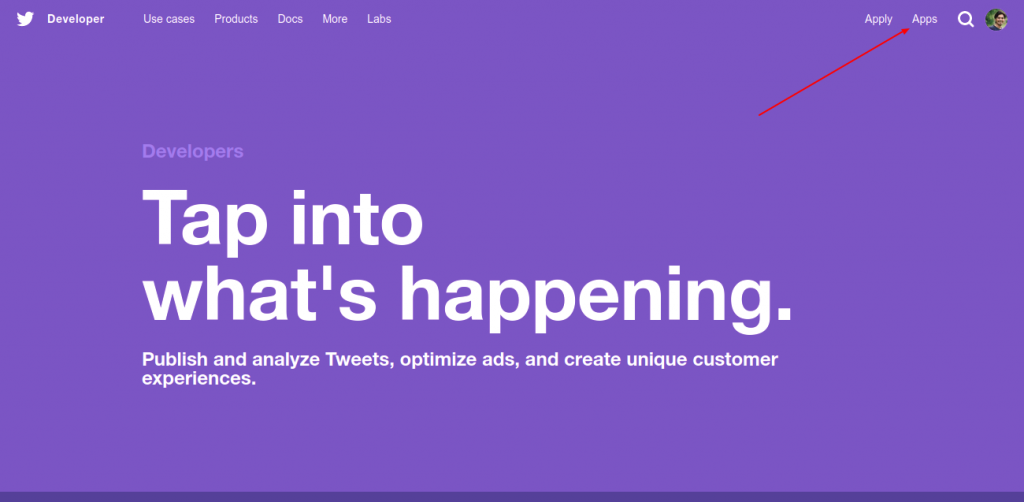
By Clicking on “Apps” it will show below screen when No app will be there.
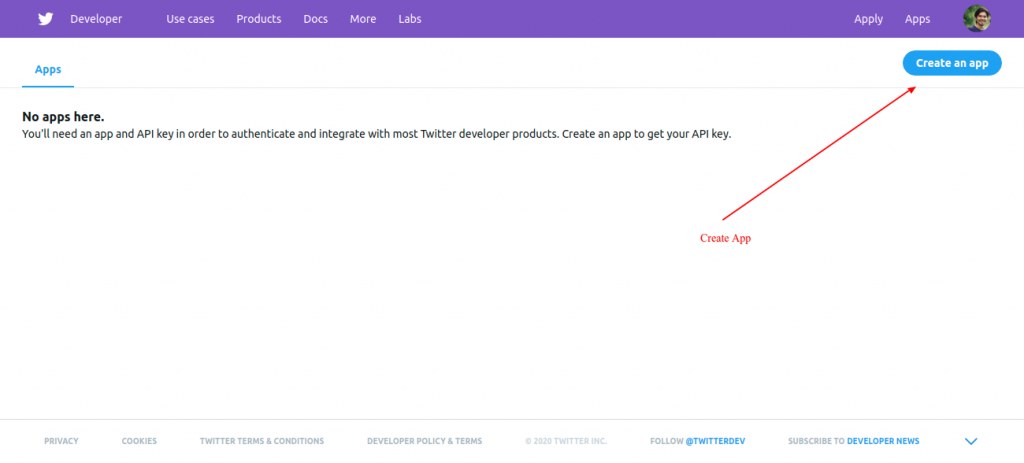
Here we will see button called “Create an app” click on it.
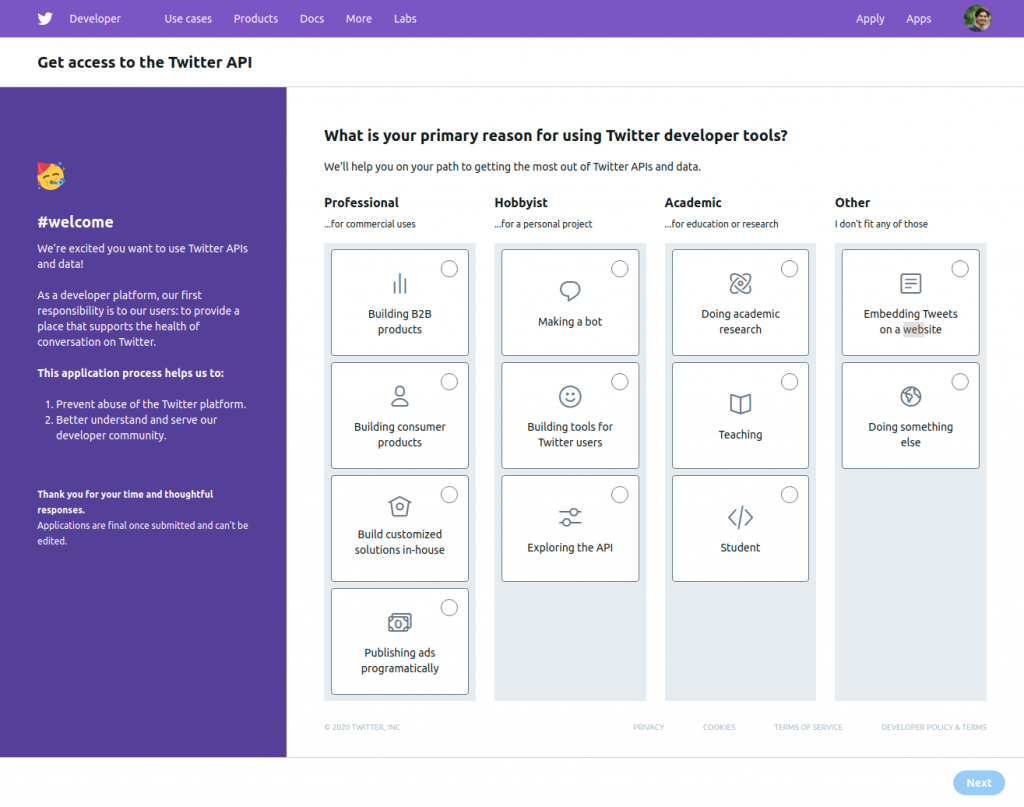
As above checkout the options of developer tools.
Choose one of them from related options. In my case I am just using this app for login purpose only, so i choose “Exploring the API” option from “Hobbyist” section.
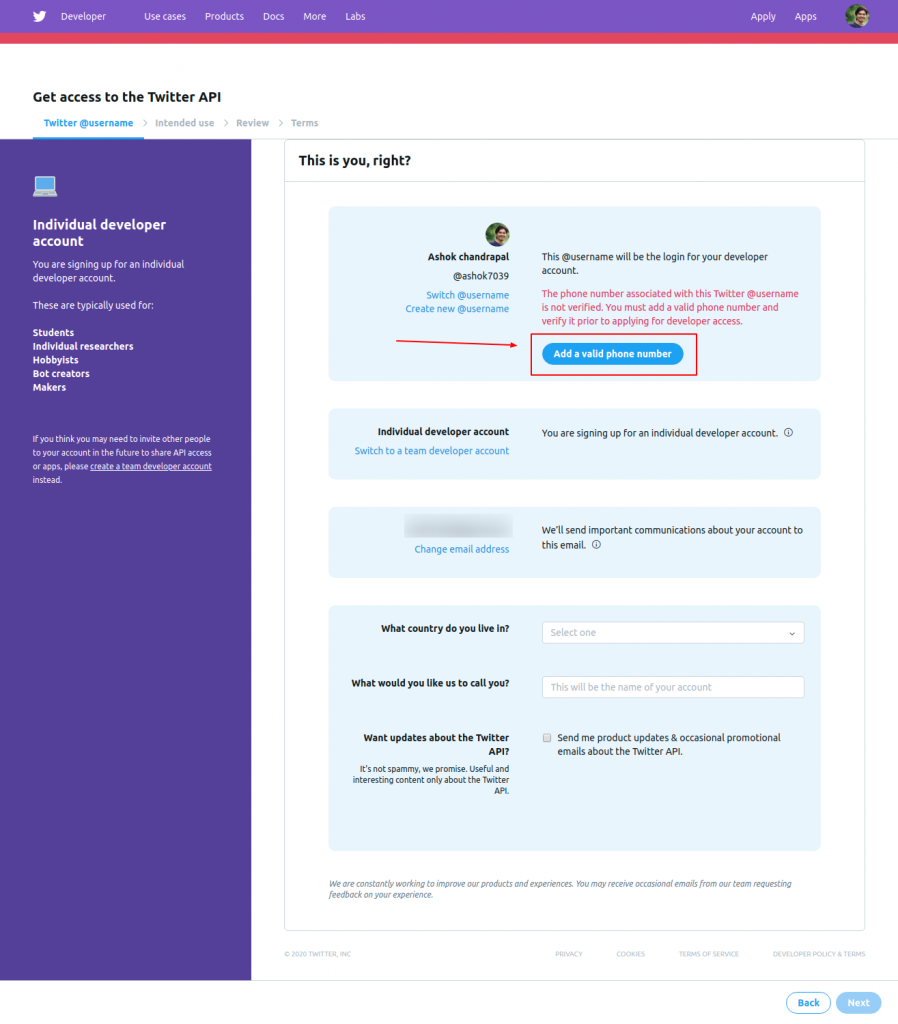
However, at above screen if the phone number is not verified or the phone number is not added. like in my case I did not added phone number yet.
Okay so by following the steps we need to verify phone number and then proceed to next step.
So you will prompted to below screen about some Q & A because twitter want’s to know how you are going to use this API, and the reason for implementing this API.
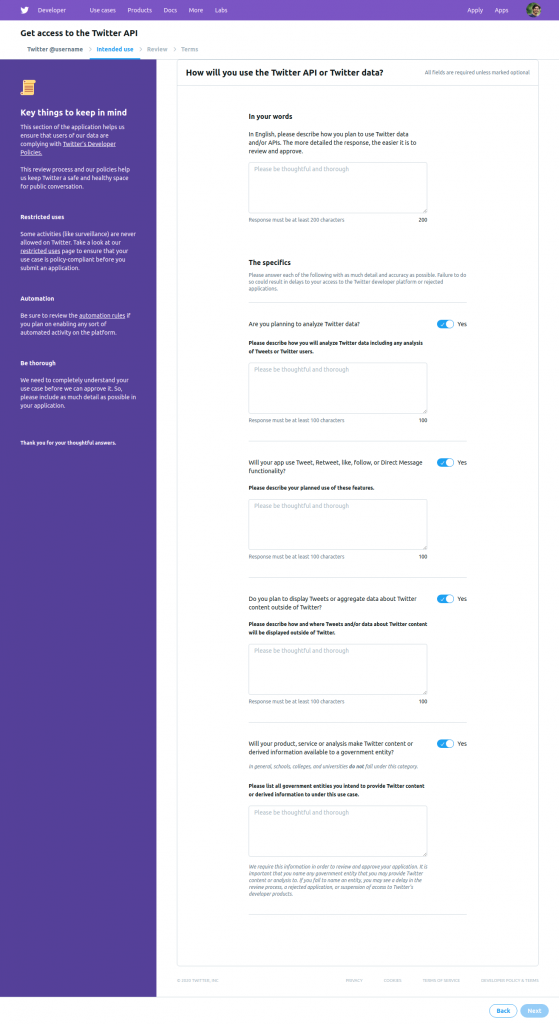
Well, I have described reason as per the example, you can use your’s in own words for the same. then proceed to next steps.
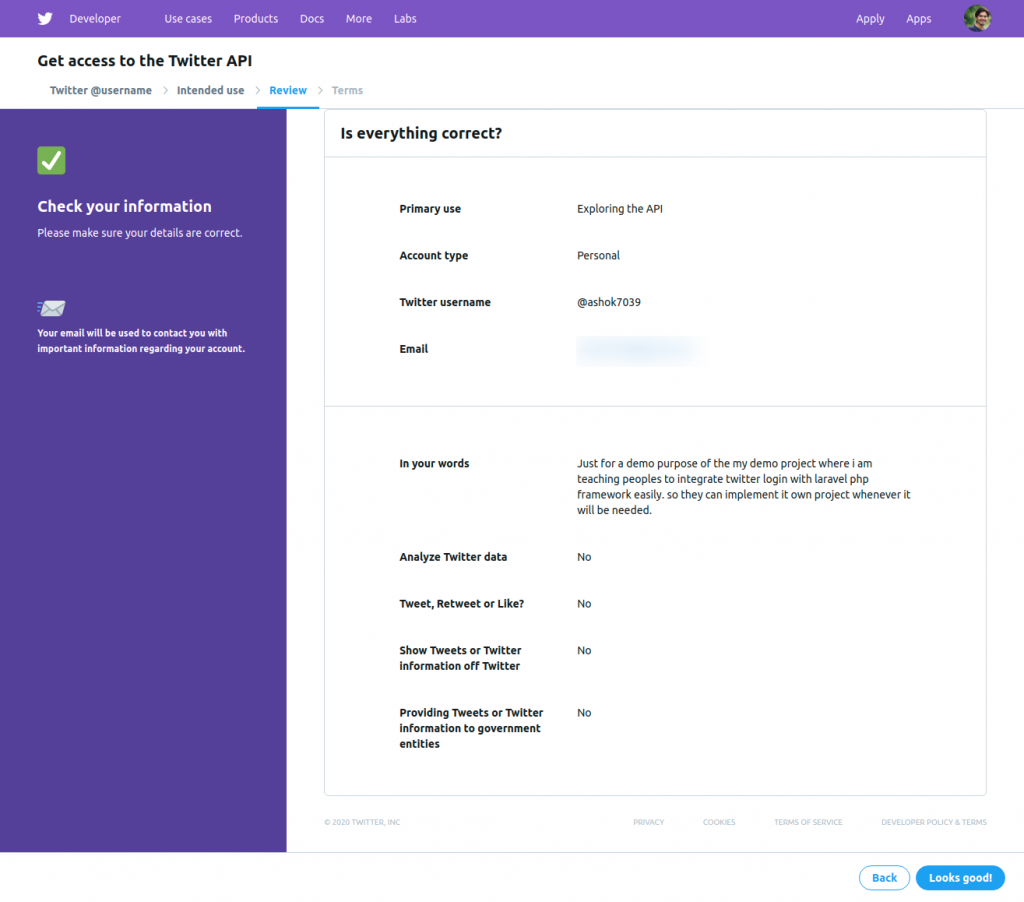
After clicking on next, once everything is correct then we will land on above page for confirmation.
If you think everything is looks good. Please go ahead to click button “Looks good!”
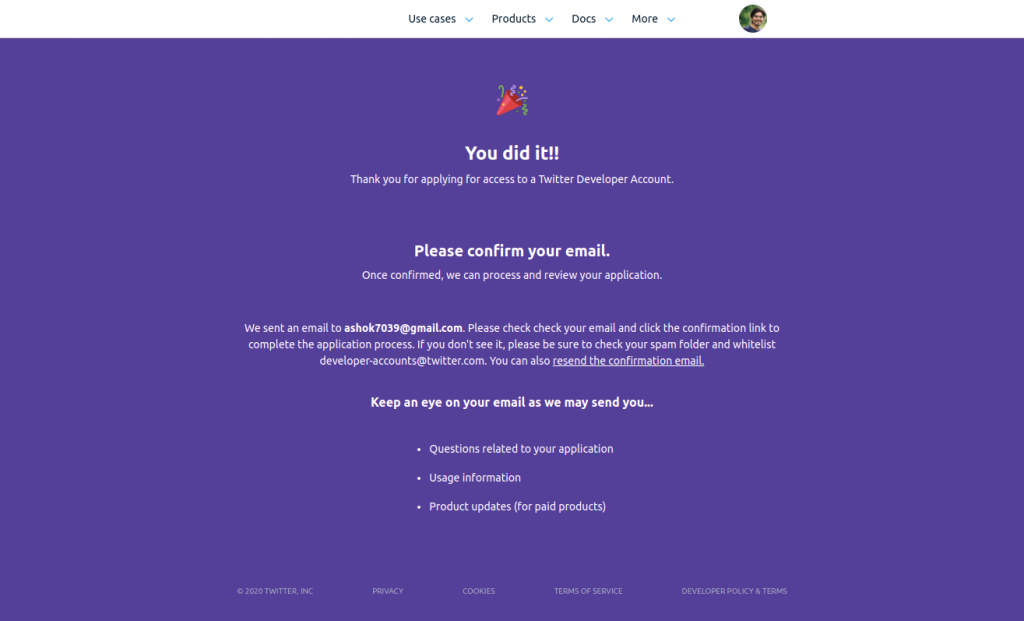
Here in this case we need to confirm our email address and proceed further.
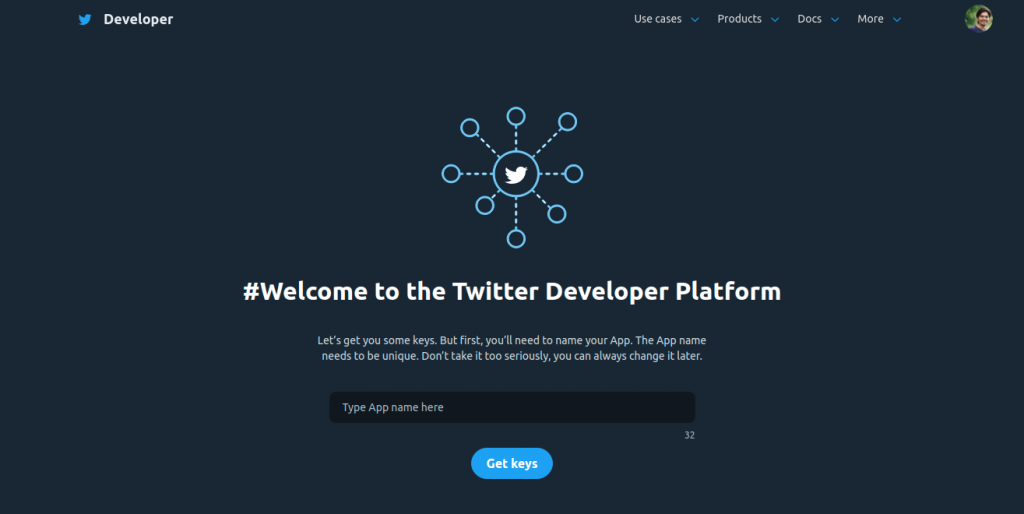
Enter valid name related to what you are going to with API and click on “Get Keys”. Once we are done, we will see below screen. where all the credentials of the App is shown.
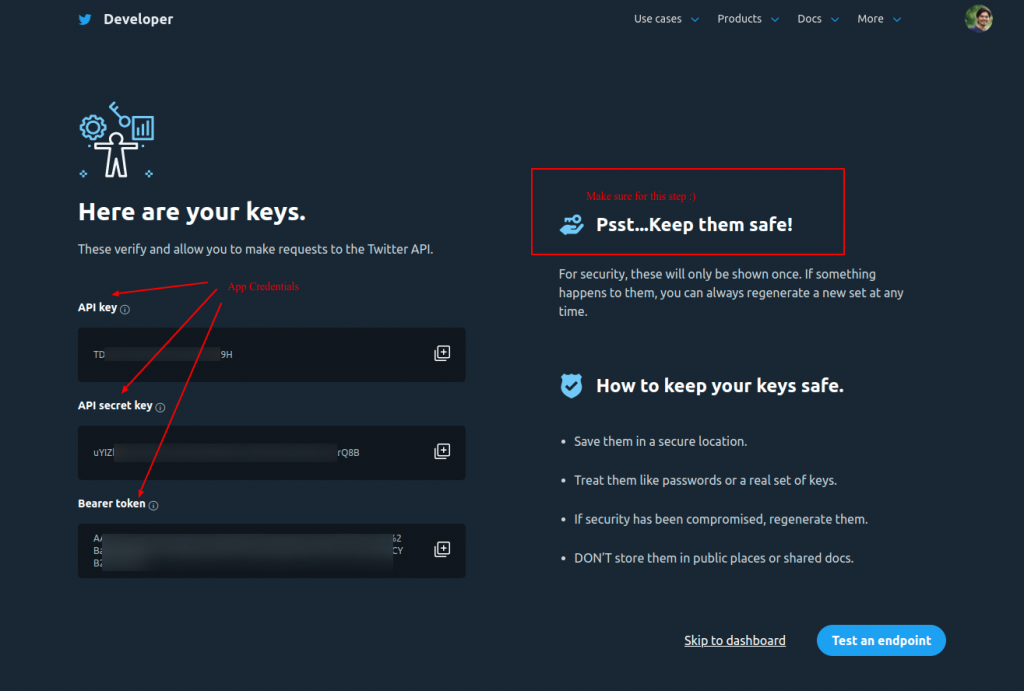
Please make sure to save those credentials somewhere safe in you local PC or wherever you think is safe.
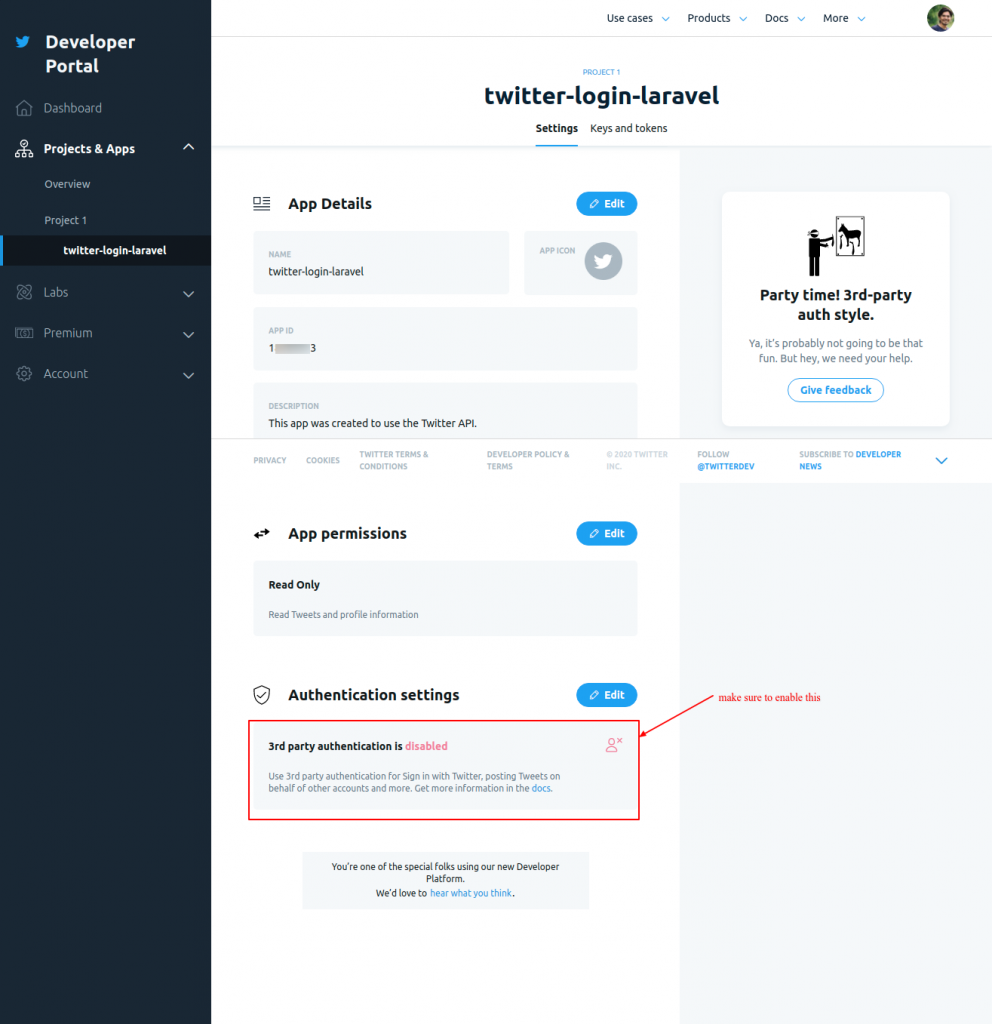
One thing i forgot to mention is here in app detail page you will the mentioned thing called “3rd party authentication is”. so please make sure that you enable it because we are going to use it for login authentication.
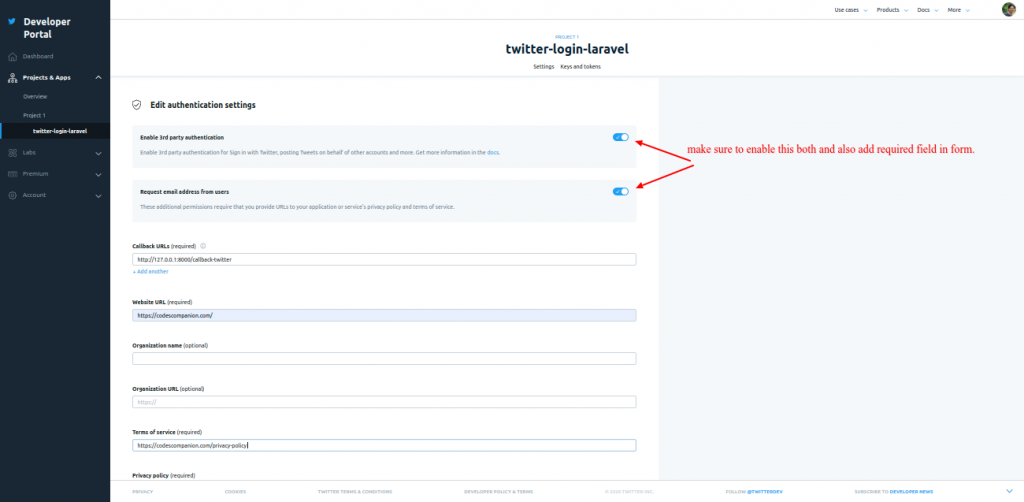
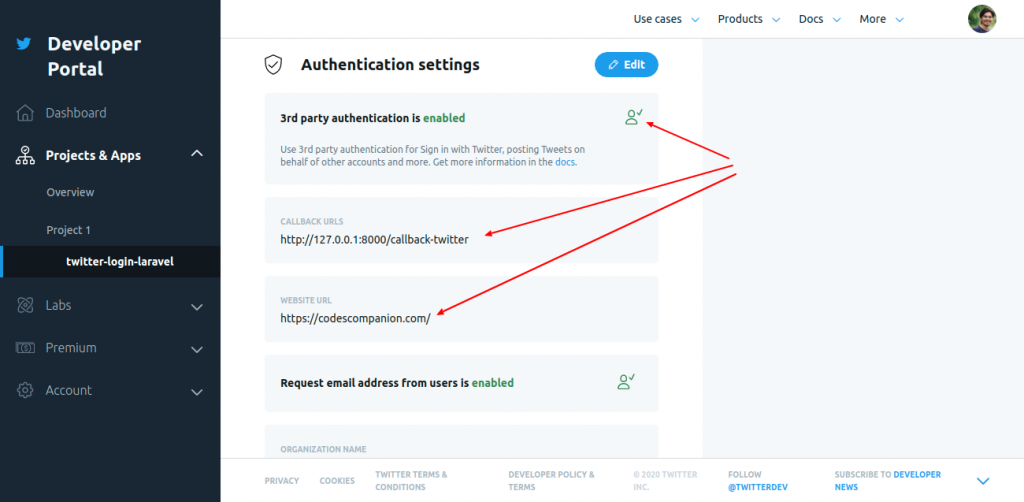
Moreover we will land on this page when enabling authentication setting. please make sure to read and enable those mentioned variables, which we needed to make login with twitter possible.
Also please add “Callback URL” as described. Please keep the callback URL same for now as I am going to use this further in coding, so to run demo successfully please do keep it same as per screenshot.
Yey! Now we are set for twitter side of it. now its turns to implement with Laravel.
Install Laravel
Click here to read step by step guide to know how to install Laravel
Make sure that your storage folder have write permission here.
Its time to create the database and update “.env” accordingly
Now make authentication configuration and migrate stuff.
$ composer create-project --prefer-dist laravel/laravel laravel-login-with-twitter "5.8.*"
$ php artisan make:auth
$ php artisan migrate
Install Socialite package
$ composer require laravel/socialiteNow we have to write configurations for our Socialite package.
We do this by updating to “app.php” inside ”config” folder and insert the below codes.
In “app.php”, scroll down to “providers” section and add Socialite service provider package as below:
Laravel\Socialite\SocialiteServiceProvider::class,Inside the file “app.php” we will set “aliases” by adding below configuration line.
'Socialite' => Laravel\Socialite\Facades\Socialite::class,Updated “config” > “service.php” to configure socialite services by adding below code.
'twitter' => [
        'client_id' => env('TWITTER_APP_KEY'),
        'client_secret' => env('TWITTER_APP_SECRET'),
        'redirect' => env('TWITTER_REDIRECT'),
],
Time to set all above ENV variables to .env file.
TWITTER_APP_KEY=XXXXXXXXXXXXXXXXXXXXXXXX
TWITTER_APP_SECRET=XXXXXXXXXXXXXXXXXXXXXXXXXXXXXXXXXXXX
TWITTER_REDIRECT=http://127.0.0.1:8000/callback-twitter
Just for this example, we will set the “TWITTER_REDIRECT” variable same as mentioned.
Controller creation and code implementation.
Execute below command to create new controller to handle operation and process.
$ php artisan make:controller SocialAuthTwitterControllerWe need to create functions inside controller: redirect() function to redirect the user to twitter page for authentication, and callback() function is used to handle user authentication.
Inside SocialAuthTwitterController please add below code.
<?php

namespace App\Http\Controllers;
use Illuminate\Http\Request;
use Socialite;
use App\Services\SocialTwitterAccountService;

class SocialAuthTwitterController extends Controller
{
  /**
   * Create a redirect method to twitter api.
   *
   * @return void
   */
    public function redirect(Request $request)
    {
        return Socialite::driver('twitter')->redirect();
    }

    /**
     * Return a callback method from twitter api.
     *
     * @return callback URL from twitter
     */
    public function callback(SocialTwitterAccountService $service, Request $request)
    {

      $user = $service->createOrGetUser(Socialite::driver('twitter')->user());
      auth()->login($user);
      return redirect()->to('/');
    }
}
Time to add routes based on controller and function inside.
//For twitter login
Route::get('/redirect', 'SocialAuthTwitterController@redirect');
Route::get('/callback-twitter', 'SocialAuthTwitterController@callback');
Step to navigate to ‘resources’ > ‘views’ > ‘auth’ > ‘login.blade.php’.
Therefore, we will add the twitter Login button. I have used one of live URL of twitter login button image. You can use your own.
@extends('layouts.app')

@section('content')
<div class="container">
    <div class="row justify-content-center">
        <div class="col-md-8">
            <div class="card">
                <div class="card-header">{{ __('Login') }}</div>

                <div class="card-body">
                    <form method="POST" action="{{ route('login') }}">
                        @csrf

                        <div class="form-group row">
                            <label for="email" class="col-md-4 col-form-label text-md-right">{{ __('E-Mail Address') }}</label>

                            <div class="col-md-6">
                                <input id="email" type="email" class="form-control @error('email') is-invalid @enderror" name="email" value="{{ old('email') }}" required autocomplete="email" autofocus>

                                @error('email')
                                    <span class="invalid-feedback" role="alert">
                                        <strong>{{ $message }}</strong>
                                    </span>
                                @enderror
                            </div>
                        </div>

                        <div class="form-group row">
                            <label for="password" class="col-md-4 col-form-label text-md-right">{{ __('Password') }}</label>

                            <div class="col-md-6">
                                <input id="password" type="password" class="form-control @error('password') is-invalid @enderror" name="password" required autocomplete="current-password">

                                @error('password')
                                    <span class="invalid-feedback" role="alert">
                                        <strong>{{ $message }}</strong>
                                    </span>
                                @enderror
                            </div>
                        </div>

                        <div class="form-group row">
                            <div class="col-md-6 offset-md-4">
                                <div class="form-check">
                                    <input class="form-check-input" type="checkbox" name="remember" id="remember" {{ old('remember') ? 'checked' : '' }}>

                                    <label class="form-check-label" for="remember">
                                        {{ __('Remember Me') }}
                                    </label>
                                </div>
                            </div>
                        </div>

                        <div class="form-group row mb-0">
                            <div class="col-md-8 offset-md-4">
                                <button type="submit" class="btn btn-primary">
                                    {{ __('Login') }}
                                </button>

                                @if (Route::has('password.request'))
                                    <a class="btn btn-link" href="{{ route('password.request') }}">
                                        {{ __('Forgot Your Password?') }}
                                    </a>
                                @endif
                            </div>
                        </div>
                    </form>
                    <div class="row">
                        <div class="col-12 text-center">
                            <p>OR</p>
                        </div>
                        <div class="col-12 text-center">
                            <div class="form-group">
                                <div class="col-md-12 col-md-offset-4">
                                    <a href="{{ url('/redirect') }}" >
                                        <img src="https://www.techotopia.com/images/a/a0/Firebase_auth_twitter_button.png" alt="Login with twitter" height="60" />
                                    </a>
                                </div>
                            </div>
                        </div>
                    </div>
                </div>
            </div>
        </div>
    </div>
</div>
@endsection
Create model and code implement.
Path: app > SocialTwitterAccount.php
<?php

// SocialTwitterAccount.php
namespace App;

use Illuminate\Database\Eloquent\Model;

class SocialTwitterAccount extends Model
{
  protected $fillable = ['user_id', 'provider_user_id', 'provider'];
  public function user()
  {
      return $this->belongsTo(User::class);
  }
}
Create database migration with below code
$ php artisan make:migration create_social_twitter_accounts_tableMoreover navigate to “database” > “migrations” > “create_social_twitter_accounts_table.php” and add lines of code as mentioned below.
<?php

 // create_social_twitter_accounts.php
 use Illuminate\Support\Facades\Schema;
 use Illuminate\Database\Schema\Blueprint;
 use Illuminate\Database\Migrations\Migration;
 class CreateSocialTwitterAccountsTable extends Migration
 {
    /**
     * Run the migrations.
     *
     * @return void
     */
    public function up()
    {
        Schema::create('social_twitter_accounts', function (Blueprint $table) {
          $table->integer('user_id');
          $table->string('provider_user_id');
          $table->string('provider');
          $table->timestamps();
        });
    }
    /**
     * Reverse the migrations.
     *
     * @return void
     */
    public function down()
    {
        Schema::dropIfExists('social_twitter_accounts');
    }
 }
Time to Run below command in another words we are done with migration part.
$ php artisan migrate:refreshCreate Service for the Twitter login
Path: app > Services > SocialTwitterAccountService.php
<?php
namespace App\Services;
use App\SocialTwitterAccount;
use App\User;
use Laravel\Socialite\Contracts\User as ProviderUser;
use Illuminate\Support\Facades\Mail;


class SocialTwitterAccountService
{
    public function createOrGetUser(ProviderUser $providerUser)
    {
        $account = SocialTwitterAccount::whereProvider('twitter')
            ->whereProviderUserId($providerUser->getId())
            ->first();

        if ($account) {
            return $account->user;
        } else {
            $account = new SocialTwitterAccount([
                'provider_user_id' => $providerUser->getId(),
                'provider' => 'twitter'
            ]);
            $user = User::whereEmail($providerUser->getEmail())->first();
            if (!$user) {
                $user = User::create([
                    'email' => $providerUser->getEmail(),
                    'name' => $providerUser->getName(),
                    'password' => md5(uniqid()), // we use md5 where user will not able to use this as normal login :)
                    'role'=>'customer',
                ]);

                if($user){
                    $data = [];
                    $data['email'] = $providerUser->getEmail();
                    $data['name'] = $providerUser->getName();
                }
            }
            $account->user()->associate($user);
            $account->save();
            return $user;
        }
    }
}
Therefore, We have successfully integrated twitter login to our laravel application.
Lastly, final step to run below command to run Laravel
$ php artisan serveAs a result we will see below screen as an output.
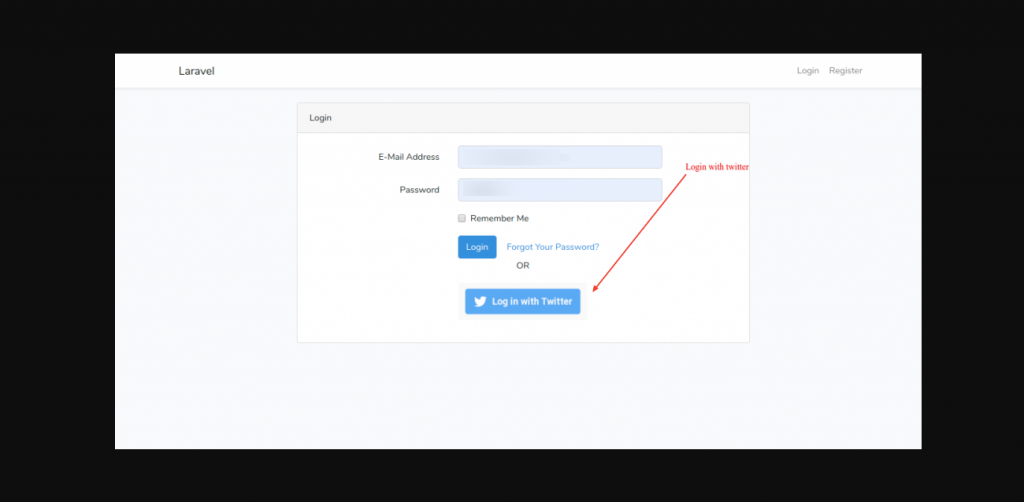
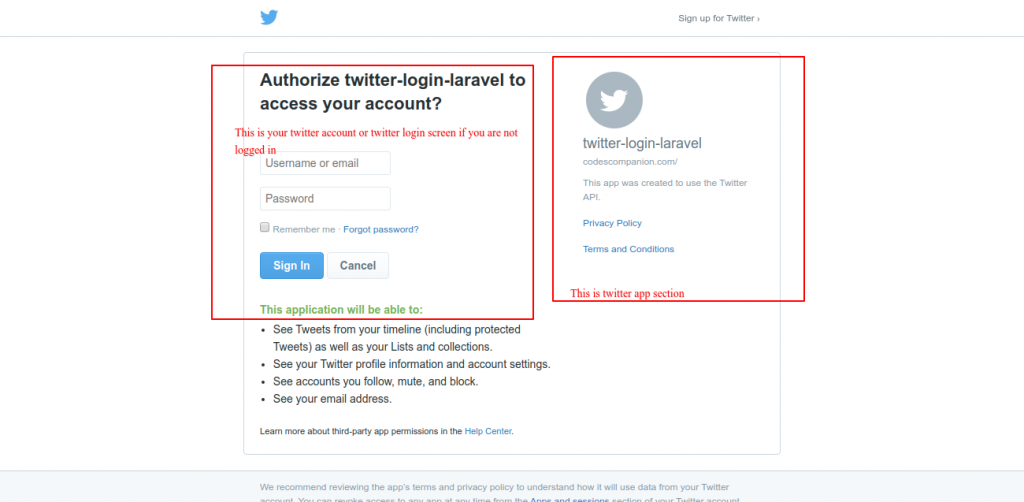
When we click on “Login with twitter” button, it will open page as below.
However you can also find below Github Repo for quick installation.
In conclusion, following up explanation with steps are easy. Feel free to comment and ask questions if anything.
Awesome!! It’s done. Please share your thoughts with suggestions in comment if any.
PS. Checkout another tutorial about Facebook login integration with Laravel