


Hello Coders !! This article is about print Hello world tutorial in laravel with Vue js and vutiefy. So this is the basic beginner tutorial for Vue js and vutiefy with laravel.
1. Install Laravel
So, first of all, let’s install the fresh laravel to start this tutorial. Below is the command to install fresh laravel in your system.
composer create-project --prefer-dist laravel/laravel laravelvueCurrently, we are installing laravel in our working directory with the project name “laravelvue“.
You can also follow this tutorial if you are a beginner with laravel then you can set up the laravel using this article Install Laravel.
After successfully setup laravel now you can go for the next step.
2. Install and enable vue js
Go to your project directory and run below command
composer require laravel/uiYou can ignore this command but might be you need authentication so you can run this command and install the laravel/ui package.
This command will install package and you can see that in composer.json. Now when you write below command.
php artiasn help uiThis will return this type of output.
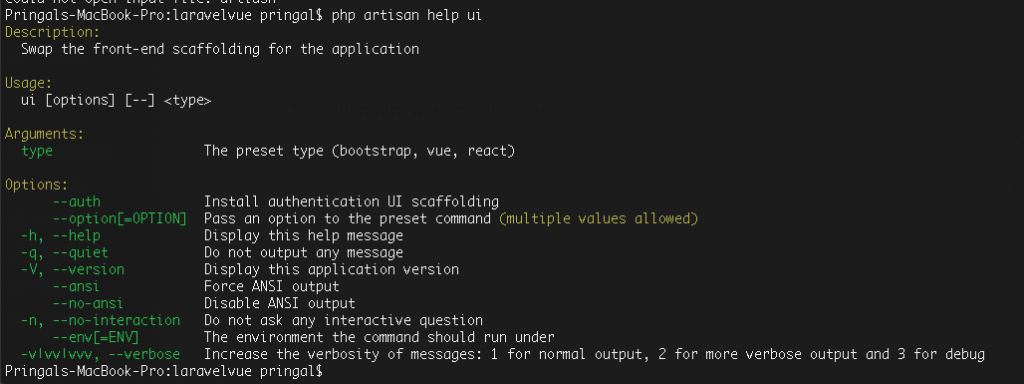
Here in the description: you can see “swap the front-end scaffolding for the application” so for this message you have to set up the front-end scaffolding and for this, you need to type below command.
php artisan ui vueNow, as per the instruction you need to run npm command for this command you should have node js install in your system.
npm install && npm install vue-router vuetifyThis command will install vue js and vuetify in a while after that from the output you can check the versions of vue-router and vuetify and you got to know that it’s perfectly installed.
3. Configure and test Vue js
Let’s continue with the default laravel view file.
Open the view file named welcome.blade.php file and the path is /root/resources/view/welcome.blade.php
You can remove unwanted elements followed by empty the body tags and remove all style tags and then the updated file will look like this.
<!DOCTYPE html>
<html lang="{{ str_replace('_', '-', app()->getLocale()) }}">
    <head>
        <meta charset="utf-8">
        <meta name="viewport" content="width=device-width, initial-scale=1">

        <title>Laravel</title>

        <!-- Fonts -->
        <link href="https://fonts.googleapis.com/css?family=Nunito:200,600" rel="stylesheet">
    </head>
    <body>

    </body>
</html>
After removal of the unwanted element, you need to add one div with the id app <div id=”app”></div> and then the file will look like this.
<!DOCTYPE html>
<html lang="{{ str_replace('_', '-', app()->getLocale()) }}">
    <head>
        <meta charset="utf-8">
        <meta name="viewport" content="width=device-width, initial-scale=1">

        <title>Laravel</title>

        <!-- Fonts -->
        <link href="https://fonts.googleapis.com/css?family=Nunito:200,600" rel="stylesheet">
    </head>
    <body>
        <div id="app"></div>
    </body>
</html>
After this, in the terminal, you need to write this command
npm run watchThis command will start the watcher.
Now, open the app.js file from /root/resources/js/app.js
/**
 * First we will load all of this project's JavaScript dependencies which
 * includes Vue and other libraries. It is a great starting point when
 * building robust, powerful web applications using Vue and Laravel.
 */

require('./bootstrap');

window.Vue = require('vue');

/**
 * The following block of code may be used to automatically register your
 * Vue components. It will recursively scan this directory for the Vue
 * components and automatically register them with their "basename".
 *
 * Eg. ./components/ExampleComponent.vue -> <example-component></example-component>
 */

// const files = require.context('./', true, /\.vue$/i)
// files.keys().map(key => Vue.component(key.split('/').pop().split('.')[0], files(key).default))

Vue.component('example-component', require('./components/ExampleComponent.vue').default);

/**
 * Next, we will create a fresh Vue application instance and attach it to
 * the page. Then, you may begin adding components to this application
 * or customize the JavaScript scaffolding to fit your unique needs.
 */

const app = new Vue({
    el: '#app',
});
Here the explanation of the component
Here vue is initializing.
require('./bootstrap');

window.Vue = require('vue');
One default component is already loaded here.
Vue.component('example-component', require('./components/ExampleComponent.vue').default);Here global component is already created named example-component.
Now in your view file, you need to use this component and after adding this component along with CSS and js attachments in it the file will look like this.
<!DOCTYPE html>
<html lang="{{ str_replace('_', '-', app()->getLocale()) }}">
    <head>
        <meta charset="utf-8">
        <meta name="viewport" content="width=device-width, initial-scale=1">

        <title>Laravel</title>

        <!-- Fonts -->
        <link href="https://fonts.googleapis.com/css?family=Nunito:200,600" rel="stylesheet">
    </head>
    <body>
        <div id="app">
            <example-component />
        </div>
    </body>
</html>
Now this example-component will render everything written inside this file /root/resources/js/component/ExampleComponent.vue
//ExampleComponent.vue
<template>
<div class="container">
<div class="row justify-content-center">
<div class="col-md-8">
<div class="card">
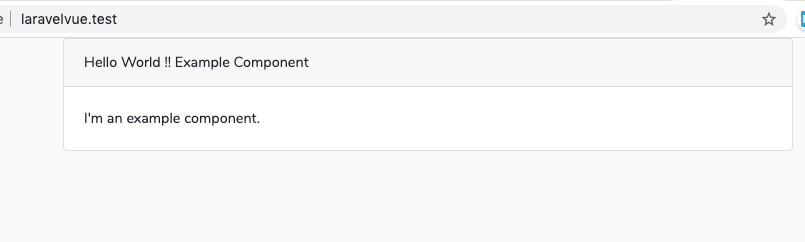
<div class="card-header">Hello World !! Example Component</div>
<div class="card-body">
I'm an example component.
</div>
</div>
</div>
</div>
</div>
</template>
<script>
export default {
mounted() {
console.log('Component mounted.')
}
}
</script>
Here whatever you write it will reflect on the front-end of your setup. You are Done now!!
The output will look like this.
So this is the basic article for print Hello World tutorial in Laravel with Vue js and vutiefy. I hope you guys enjoyed learning new things !!
Please check out our other article also Install latest Nodejs And NPM in Ubuntu
Wow because this is great job! Congrats and keep it up.
Exceptionally individual pleasant site. Immense details available on couple of gos to.
Wow cuz this is great work! Congrats and keep it up.