


This article is about Install LAMP Stack on Ubuntu 18.04 in 15 minutes in a fresh Linode server and Ubuntu 18.04.
Linode is providing a cheaper plan of $5 per month to host the regular site. Here is the signup link if you want to purchase one with $5 per month Here
What is a LAMP Stack?
A brief about Lamp Stack
LAMP stands for Linux, Apache, MySQL, and PHP and stack is a common open-source web stack used for hosting the website in a Linux environment.
First thing you need to login in to Linode and then open the Linodes tab and select the droplet and then from the above tab click on the Networking tab from there you can get the SSH Access.
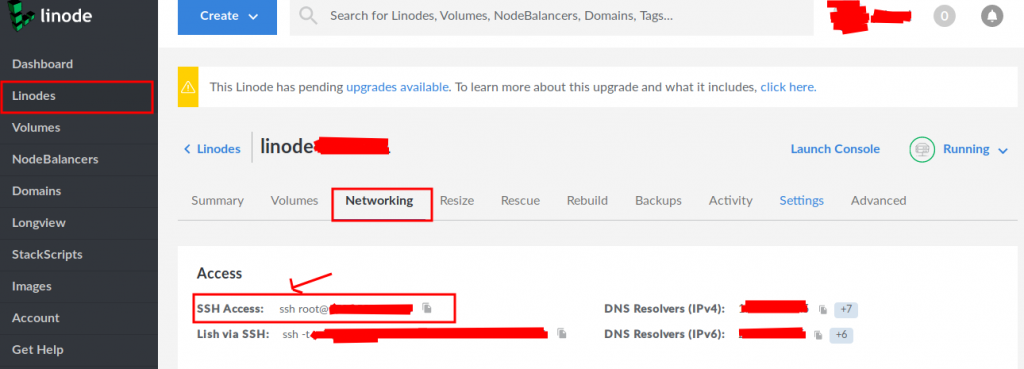
and use the root password for login from the terminal.
paste this link to a terminal and enter the password and login to the server after login your screen will look like this.
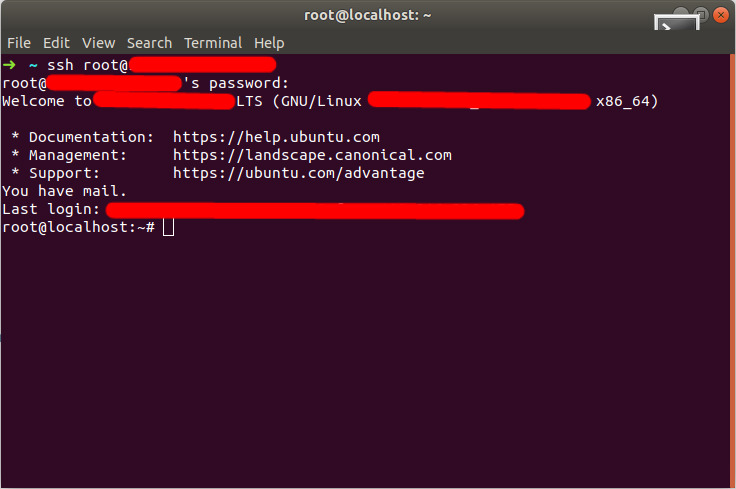
Now after login run this command
$ sudo apt update && sudo apt upgradeThis will update the system.
Step 1 : Install Tasksel
Run below command in terminal
$ sudo apt install taskselTasksel is a Ubuntu tool that installs multiple related packages as a co-ordinated task onto your system.
Step 2 : Use Tasksel to install the LAMP stack:
Now Run Below command in terminal
$ sudo tasksel install lamp-serverThis will install all the required packages.
Reset MySQL Password (Opional)
You can skip this step
Let’s set the password of MySQL because default password is NULL so if you want to set the password then enter in MySQL
$ mysqlyou will now see the screen terminal headed like this >mysql and now you can run MySQL query form here so reset the password using this command
$ ALTER USER 'root'@'localhost' IDENTIFIED BY 'new_password';Then reset privileges
$ FLUSH PRIVILEGES;Then
$ quit;Now let’s restart MySQL
$ service mysql restartNow you can confirm that the new password has been applied correctly by running
$ mysql -u root -pStep 3 : Install Curl and mbstring
Let’s install curl by typing this command because we need curl to transfer data to and from servers.
$ sudo apt install curl
$ curl http://icanhazip.com

$ sudo systemctl restart apache2
After this install php mbstring. Mbstring is used to convert strings to different encodings.
$ sudo apt-get install php-mbstringStep 4 : Edit Conf File
Currently, Apache will default look first for the file index.html so
So for that run this command for open this file dir.conf
$ sudo nano /etc/apache2/mods-enabled/dir.confIt will look like this:
<IfModule mod_dir.c>
    DirectoryIndex index.html index.cgi index.pl index.php index.xhtml index.htm
</IfModule>
Move the index.php file to the first position after the DirectoryIndex specification, like below one
<IfModule mod_dir.c>
    DirectoryIndex index.php index.html index.cgi index.pl index.xhtml index.htm
</IfModule>
When you done with this press Ctrl+X and confirm yes by typing Y and then hit ENTER and save the file then run this.
$ sudo systemctl restart apache2This will restart the server.
Now it’s ready to use you can start running your site here. !!
Happy Coding !! So this article is about the Install LAMP Stack on Ubuntu 18.04 in 15 minutes. Also, you can check our article related to Laravel.