


This tutorial is about Laravel 5 – How to create REST API Authentication using Passport? To learn about using a laravel passport authentication for REST API. Passport package is providing a really good interface.
What is API?
API stands for Application program interface. API is also known as Web services in a programming language. We all know that Laravel is very popular because of the way of developing an API.
Apart from passport, there is another authentication way also like 0auth2, JWT, etc. But here we will use the laravel passport package authentication for API authentication. Laravel Passport is built on League OAuth2 server.
Let’s start with the build a fresh laravel. Here are the steps to follow
- Install Laravel
For Laravel installation follow this my previous article
Article: How to install Laravel 5.X
Step 2 : Install Passport package
Install third-party package
To install the passport package open the Terminal and open your project directory and run this command.
composer require laravel/passport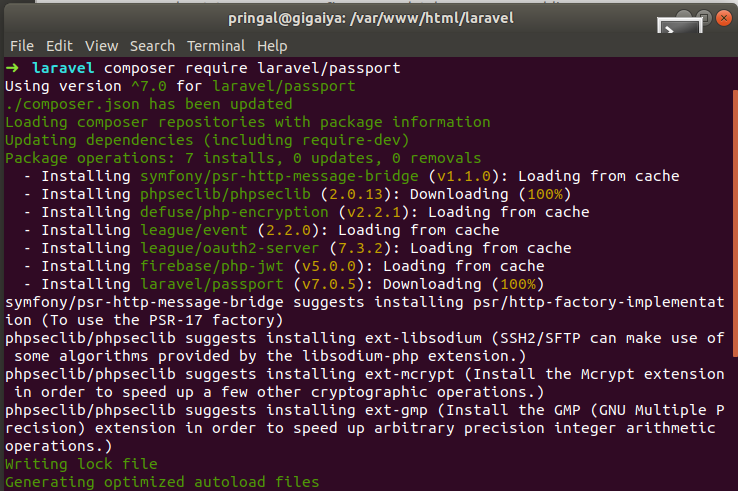
Above installed third-party passport, the library comes with its own data tables and first we just need to run the laravel migration for migrating the tables in the database.
php artisan migrate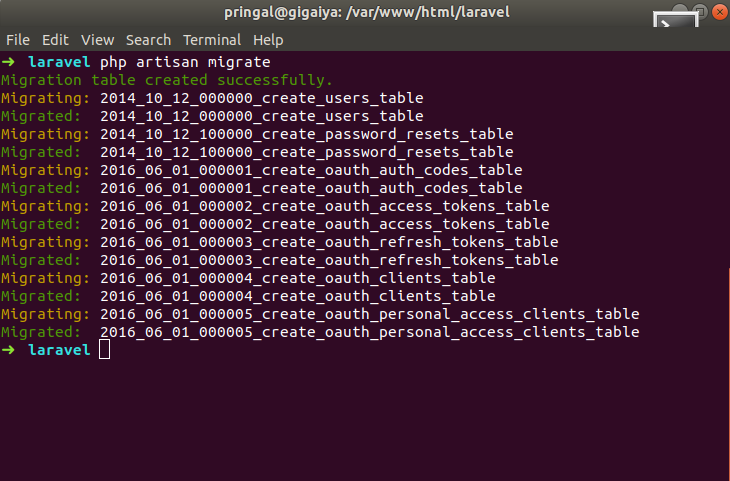
2. Laravel Passport configuration
There
So now this below command is for generate Passport keys and clients to generate access tokens, use the following command:
php artisan passport:installIf you run this command in your terminal it will show up like below image.
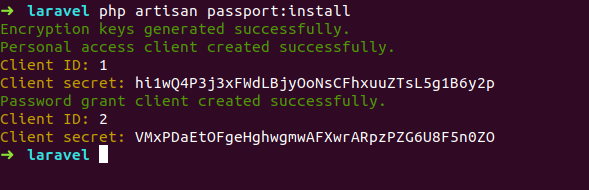
It is unmistakably saying that Encryption keys have been produced and there is a couple of customers made that Personal Access customer and Password Grant customer.
3. Update User Model:
After the installation now we need to add HasApiTokens trait to our User model file. So now, we will open up User.php file from this path <root>/app/User.php file and update according to the file showing below:
namespace App;

use Illuminate\Notifications\Notifiable;
use Illuminate\Foundation\Auth\User as Authenticatable;
use Laravel\Passport\HasApiTokens;

class User extends Authenticatable
{
    use Notifiable, HasApiTokens;

    /**
     * The attributes that are mass assignable.
     *
     * @var array
     */
    protected $fillable = [
        'name', 'email', 'password',
    ];

    /**
     * The attributes that should be hidden for arrays.
     *
     * @var array
     */
    protected $hidden = [
        'password', 'remember_token',
    ];
}
4. Update AuthServiceProvider:
Open /app/Providers/AuthServiceProvider.php file and add Passport::routes(); inside the boot method, as showing below:
<?php

namespace App\Providers;

use Illuminate\Support\Facades\Gate;
use Illuminate\Foundation\Support\Providers\AuthServiceProvider as ServiceProvider;
use Laravel\Passport\Passport;

class AuthServiceProvider extends ServiceProvider
{
    /**
     * The policy mappings for the application.
     *
     * @var array
     */
    protected $policies = [
        'App\Model' => 'App\Policies\ModelPolicy',
    ];

    /**
     * Register any authentication / authorization services.
     *
     * @return void
     */
    public function boot()
    {
        $this->registerPolicies();

        Passport::routes();
    }
}
5. Update Config/Auth.php:
Now,
'guards' => [
        'web' => [
            'driver' => 'session',
            'provider' => 'users',
        ],

        'api' => [
            'driver' => 'passport',
            'provider' => 'users',
        ],
    ],
6. Generate Default Auth
php artisan make:authThe above command will give default user auth view and controllers pre-built.
7. Create Controller for Login
Create the controller file name “UserController.php” inside the new directory “API” folder path is “app/Http/Controllers” and put the below code inside the file.
<?php
namespace App\Http\Controllers\API;
use Illuminate\Http\Request;
use App\Http\Controllers\Controller;
use App\User;
use Illuminate\Support\Facades\Auth;
use Validator;
class UserController extends Controller
{
public $successStatus = 200;
/**
* login api
*
* @return \Illuminate\Http\Response
*/
public function login(){
if(Auth::attempt(['email' => request('email'), 'password' => request('password')])){
$user = Auth::user();
$success['token'] = $user->createToken('MyApp')-> accessToken;
return response()->json(['success' => $success], $this-> successStatus);
}
else{
return response()->json(['error'=>'Unauthorised'], 401);
}
}
/**
* Register api
*
* @return \Illuminate\Http\Response
*/
public function register(Request $request)
{
$validator = Validator::make($request->all(), [
'name' => 'required',
'email' => 'required|email',
'password' => 'required',
'c_password' => 'required|same:password',
]);
if ($validator->fails()) {
return response()->json(['error'=>$validator->errors()], 401);
}
$input = $request->all();
$input['password'] = bcrypt($input['password']);
$user = User::create($input);
$success['token'] = $user->createToken('MyApp')-> accessToken;
$success['name'] = $user->name;
return response()->json(['success'=>$success], $this-> successStatus);
}
/**
* details api
*
* @return \Illuminate\Http\Response
*/
public function details()
{
$user = Auth::user();
return response()->json(['success' => $user], $this-> successStatus);
}
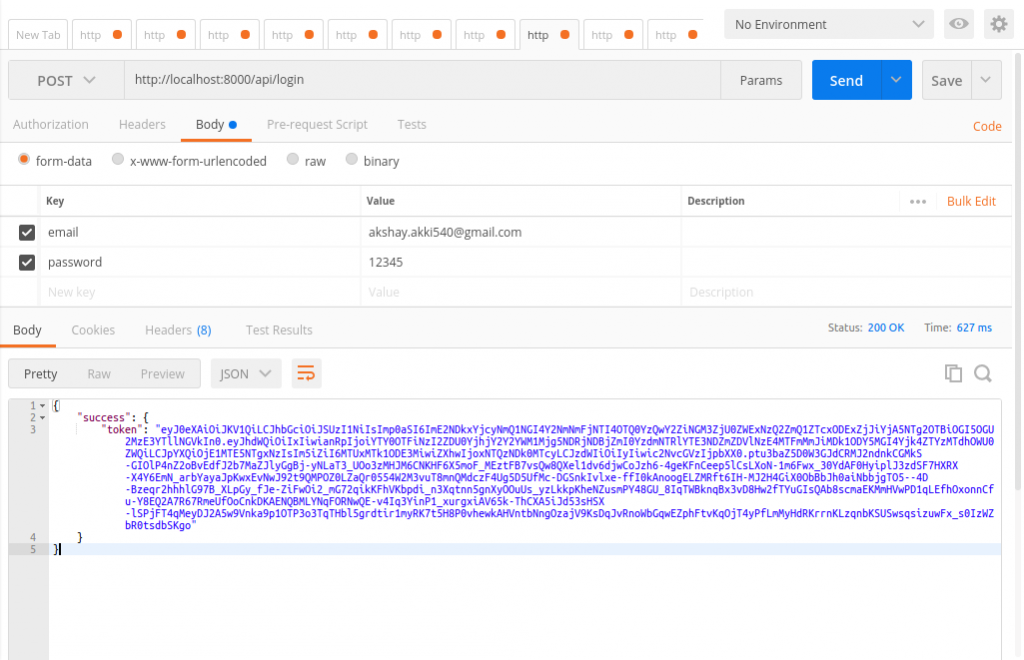
}Now run the setup
php artisan serveAfter successfully run above command you can test the login feature in “Postman” just like the below image.
So, by performing this whole article you are done with Laravel 5 – How to create REST API Authentication using Passport !! Enjoy !!
This really answered my problem, thanks!
You’re Welcome !!
You made some decent points there. I regarded on the web for the difficulty and located most people will go together with with your website.
Thank You !!
Thank you very much is very helpful, however I hope you can tell me how you could add the verification by mail using passport
Laravel Passport is providing this feature.
I have been browsing online greater than 3 hours nowadays, yet I by no
means discovered any fascinating article like yours.
It’s lovely price enough for me. Personally, if all website owners and bloggers made excellent content
material as you probably did, the web shall be a lot more helpful
than ever before.
Thank You !!
Thanks on your marvelous posting! I definitely enjoyed reading it, you will be a great author.I will remember to bookmark your blog and will eventually come back in the future. I want to encourage one to continue your great posts, have a nice weekend!
There’s definately a lot to learn about this topic.
I love all of the points you’ve made.