


Hello Coders !! This article about the Laravel 8 and vue.js Single-page CRUD Application SPE. And we will create a form with listing data that has the Create, delete and update feature on a single page.
These are the 6 Steps we are going to follow
- The first step Install fresh laravel 8
- The second step Install vue in laravel
- Install model along with table
- Add code in the welcome.blade.php file
- ExampleComponent.vue file
- Create PostController file
Step 1: Install fresh laravel 8
The first and foremost step is to install the latest laravel 8 using the below command.
composer create-project --prefer-dist laravel/laravel laravel-vue-speThis command will install the latest laravel framework you just need to create a database in attach credentials to it in .env files and you are ready with the laravel installation.
For a detailed laravel installation visit, this article Install Laravel.
Step 2: Install vue in laravel
The second step is we are going to install the laravel/UI package so for that run the below command in the terminal.
composer require laravel/uiAfter the above code run we run the below commands for vue
php artisan ui vuephp artisan ui vue --authnpm installnpm install axiosnpm axios is allows us to send HTTP requests to API.
After this required package installation we will run the project by running the below command and check the installed new projects homepage.
php artisan serveThis URL: http://127.0.0.1:8000/ will run the project now or you can check in your terminal for the link.
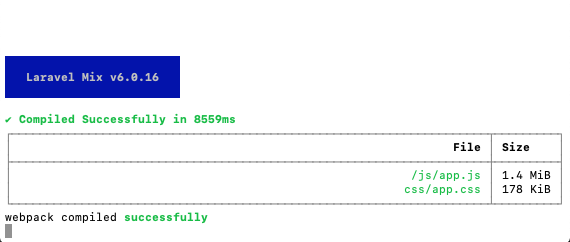
Now you need to run the below command to start npm watch
npm run watchThe output of this command will be like this in the terminal.
Step 3: Install model along with table
To create the migration table Post and model Post you need to run the below command in the terminal.
php artisan make:model Post -mAfter the creation of migration, the table adds these two attributes “title” and “body” into the migration table and the migration table will look like this.
Migration table file of Post
<?php

use Illuminate\Database\Migrations\Migration;
use Illuminate\Database\Schema\Blueprint;
use Illuminate\Support\Facades\Schema;

class CreatePostsTable extends Migration
{
    /**
     * Run the migrations.
     *
     * @return void
     */
    public function up()
    {
        Schema::create('posts', function (Blueprint $table) {
            $table->id();
            $table->string('title');
            $table->text('body');
            $table->timestamps();
        });
    }

    /**
     * Reverse the migrations.
     *
     * @return void
     */
    public function down()
    {
        Schema::dropIfExists('posts');
    }
}
After adding these two attributes run the migration command in the terminal.
php artisan migrateThis command will migrate the post table into the database. Now the important step in Laravel 8 and vue.js Single-page CRUD Application SPE.
Step 4: Add code in welcome.blade.php file
Now open pre-existing file welcome.blade.php from the resources folder and add the below code to it.
welcome.blade.php file
<!DOCTYPE html>
<html lang="{{ str_replace('_', '-', app()->getLocale()) }}">
    <head>
        <meta charset="utf-8">
        <meta name="viewport" content="width=device-width, initial-scale=1">

        <title>Laravel Vue SPE</title>

        <!-- Fonts -->
        <link href="https://fonts.googleapis.com/css2?family=Nunito:wght@400;600;700&display=swap" rel="stylesheet">

        <!-- Styles -->
        <style>
            /*! normalize.css v8.0.1 | MIT License | github.com/necolas/normalize.css */html{line-height:1.15;-webkit-text-size-adjust:100%}body{margin:0}a{background-color:transparent}[hidden]{display:none}html{font-family:system-ui,-apple-system,BlinkMacSystemFont,Segoe UI,Roboto,Helvetica Neue,Arial,Noto Sans,sans-serif,Apple Color Emoji,Segoe UI Emoji,Segoe UI Symbol,Noto Color Emoji;line-height:1.5}*,:after,:before{box-sizing:border-box;border:0 solid #e2e8f0}a{color:inherit;text-decoration:inherit}svg,video{display:block;vertical-align:middle}video{max-width:100%;height:auto}.bg-white{--bg-opacity:1;background-color:#fff;background-color:rgba(255,255,255,var(--bg-opacity))}.bg-gray-100{--bg-opacity:1;background-color:#f7fafc;background-color:rgba(247,250,252,var(--bg-opacity))}.border-gray-200{--border-opacity:1;border-color:#edf2f7;border-color:rgba(237,242,247,var(--border-opacity))}.border-t{border-top-width:1px}.flex{display:flex}.grid{display:grid}.hidden{display:none}.items-center{align-items:center}.justify-center{justify-content:center}.font-semibold{font-weight:600}.h-5{height:1.25rem}.h-8{height:2rem}.h-16{height:4rem}.text-sm{font-size:.875rem}.text-lg{font-size:1.125rem}.leading-7{line-height:1.75rem}.mx-auto{margin-left:auto;margin-right:auto}.ml-1{margin-left:.25rem}.mt-2{margin-top:.5rem}.mr-2{margin-right:.5rem}.ml-2{margin-left:.5rem}.mt-4{margin-top:1rem}.ml-4{margin-left:1rem}.mt-8{margin-top:2rem}.ml-12{margin-left:3rem}.-mt-px{margin-top:-1px}.max-w-6xl{max-width:72rem}.min-h-screen{min-height:100vh}.overflow-hidden{overflow:hidden}.p-6{padding:1.5rem}.py-4{padding-top:1rem;padding-bottom:1rem}.px-6{padding-left:1.5rem;padding-right:1.5rem}.pt-8{padding-top:2rem}.fixed{position:fixed}.relative{position:relative}.top-0{top:0}.right-0{right:0}.shadow{box-shadow:0 1px 3px 0 rgba(0,0,0,.1),0 1px 2px 0 rgba(0,0,0,.06)}.text-center{text-align:center}.text-gray-200{--text-opacity:1;color:#edf2f7;color:rgba(237,242,247,var(--text-opacity))}.text-gray-300{--text-opacity:1;color:#e2e8f0;color:rgba(226,232,240,var(--text-opacity))}.text-gray-400{--text-opacity:1;color:#cbd5e0;color:rgba(203,213,224,var(--text-opacity))}.text-gray-500{--text-opacity:1;color:#a0aec0;color:rgba(160,174,192,var(--text-opacity))}.text-gray-600{--text-opacity:1;color:#718096;color:rgba(113,128,150,var(--text-opacity))}.text-gray-700{--text-opacity:1;color:#4a5568;color:rgba(74,85,104,var(--text-opacity))}.text-gray-900{--text-opacity:1;color:#1a202c;color:rgba(26,32,44,var(--text-opacity))}.underline{text-decoration:underline}.antialiased{-webkit-font-smoothing:antialiased;-moz-osx-font-smoothing:grayscale}.w-5{width:1.25rem}.w-8{width:2rem}.w-auto{width:auto}.grid-cols-1{grid-template-columns:repeat(1,minmax(0,1fr))}@media (min-width:640px){.sm\:rounded-lg{border-radius:.5rem}.sm\:block{display:block}.sm\:items-center{align-items:center}.sm\:justify-start{justify-content:flex-start}.sm\:justify-between{justify-content:space-between}.sm\:h-20{height:5rem}.sm\:ml-0{margin-left:0}.sm\:px-6{padding-left:1.5rem;padding-right:1.5rem}.sm\:pt-0{padding-top:0}.sm\:text-left{text-align:left}.sm\:text-right{text-align:right}}@media (min-width:768px){.md\:border-t-0{border-top-width:0}.md\:border-l{border-left-width:1px}.md\:grid-cols-2{grid-template-columns:repeat(2,minmax(0,1fr))}}@media (min-width:1024px){.lg\:px-8{padding-left:2rem;padding-right:2rem}}@media (prefers-color-scheme:dark){.dark\:bg-gray-800{--bg-opacity:1;background-color:#2d3748;background-color:rgba(45,55,72,var(--bg-opacity))}.dark\:bg-gray-900{--bg-opacity:1;background-color:#1a202c;background-color:rgba(26,32,44,var(--bg-opacity))}.dark\:border-gray-700{--border-opacity:1;border-color:#4a5568;border-color:rgba(74,85,104,var(--border-opacity))}.dark\:text-white{--text-opacity:1;color:#fff;color:rgba(255,255,255,var(--text-opacity))}.dark\:text-gray-400{--text-opacity:1;color:#cbd5e0;color:rgba(203,213,224,var(--text-opacity))}}
        </style>

        <style>
            body {
                font-family: 'Nunito', sans-serif;
            }
        </style>
    </head>
    <body class="antialiased">
        <div class="relative flex items-top justify-center min-h-screen bg-gray-100 dark:bg-gray-900 sm:items-center py-4 sm:pt-0">
            @if (Route::has('login'))
                <div class="hidden fixed top-0 right-0 px-6 py-4 sm:block">
                    @auth
                        <a href="{{ url('/home') }}" class="text-sm text-gray-700 underline">Home</a>
                    @else
                        <a href="{{ route('login') }}" class="text-sm text-gray-700 underline">Log in</a>

                        @if (Route::has('register'))
                            <a href="{{ route('register') }}" class="ml-4 text-sm text-gray-700 underline">Register</a>
                        @endif
                    @endauth
                </div>
            @endif

            <div class="max-w-6xl mx-auto sm:px-6 lg:px-8">


                <div class="mt-8 bg-white dark:bg-gray-800 overflow-hidden shadow sm:rounded-lg">
                    <div class="grid grid-cols-1 md:grid-cols-2">
                        <div class="p-6">


                            <div class="ml-12">
                                <div class="mt-2 text-gray-600 dark:text-gray-400 text-sm">
                                   <div id="app">
                                       <example-component></example-component>

                                   </div>
                                </div>
                            </div>
                        </div>
                    </div>
                </div>
            </div>
        </div>
        <script src="{{ asset('js/app.js') }}" defer></script>
    </body>
</html>
In this above file, you just need to focus on two things that I added.
 <div id="app">
     <example-component></example-component>
 </div>
Therefore in this above code snippet, you just need to give id “app” to div so the vue component will render here.
And write down the component like this “<example-component></example-component>” what we have created in the vue file that will be written down below.
Step 5: ExampleComponent.vue file
Now open the /resources/js/components/ExampleComponent.vue file and add below code in it.
<template>
    <div class="container">
        <form @submit.prevent="submit">
        <div class="form-div">
            <label for="title">Title</label>
            <input type="text" class="form-design" v-model="form.title">
        </div>
        <div class="form-div">
            <label for="body">Body</label>
            <input type="text" class="form-design" v-model="form.body">
        </div>
        <input v-if="idToUpdate === null" type="submit" value="Submit" class="submit-button">
        <input v-else type="submit" value="Update" class="submit-button">

        </form>
        <div>
            <table v-if="posts">
                <tr>
                    <th>Title</th>
                    <th>Body</th>
                    <th>Action</th>
                </tr>
                <tr v-for="post in posts" :key="post.id">
                    <td>{{post.title}}</td>
                    <td>{{post.body}}</td>
                    <td>
                        <button @click="edit(post.id)" class="submit-button">Edit</button>
                        <button @click="remove(post.id)" class="submit-button">Delete</button>
                    </td>
                </tr>

            </table>
        </div>
    </div>
</template>

<script>
    import axios from 'axios'

    export default {
        name: 'ExampleComponent',
        data:()=>({
            form:{
                title:null,
                body:null,
            },
            posts:null,
            idToUpdate:null,
        }),
        methods:{
            submit(){
                if(this.idToUpdate === null){
                    axios.post('http://127.0.0.1:8000/api/posts',this.form).then(res=>{
                        console.log("res from api", res.data)
                        this.form.title=null,
                        this.form.body=null,
                        this.get()
                    }).catch(err=>{
                        console.log("error ",err.response)
                    })
                }else{
                    axios.put('http://127.0.0.1:8000/api/posts/'+this.idToUpdate,this.form).then(res=>{
                        console.log("res ",res.data)
                        this.form.title=null,
                        this.form.body=null,
                        this.get();
                        this.idToUpdate = null
                    }).catch(err=>{
                        console.log("error ",err.response)
                    })
                }

            },
            get(){
                axios.get('http://127.0.0.1:8000/api/posts').then(res=>{
                    console.log(">> ",res.data)
                    this.posts = res.data
                }).catch(err=>{
                    console.log("error ",err.response)
                })
            },
            edit(id){
                axios.get('http://127.0.0.1:8000/api/posts/'+id,this.form).then(res=>{
                    console.log("res: ",res.data)
                    this.form.title = res.data.title
                    this.form.body = res.data.body
                    this.idToUpdate = res.data.id
                })
            },
            update(id){

            },
            remove(id){
                axios.delete('http://127.0.0.1:8000/api/posts/'+id).then(res=>{
                    console.log('deleted',res.data)
                    this.get();
                }).catch(err=>{
                    console.log("error ",err.response)
                })
            }
        },
        created(){
            this.get();
        },
        mounted() {
            console.log('Component mounted.')
        }
    }
</script>
<style lang="scss" scoped>
    table,tr,th,td{
        border:1px solid #ddd;
    }
    .form-design{
        border: 1px solid #ccc;
        padding: 3px;
        margin: 3px;
    }
.submit-button{
    color: #fff;
    background-color: #007bff;
    border-color: #007bff;
    padding: .375rem .75rem;
    border-radius: .25rem;
    text-align: center;
    font-weight: 400;
    font-size: 1rem;
    border: 1px solid transparent;
    margin-top: 20px;
    margin-bottom: 25px;
}

</style>
Here I have written code about the form rendering in view along with vue js methods of submit(), get(), edit(), update(), remove(), created() and mounted().
In the vue file ExampleComponent.vue you noticed there are route paths are written in it.
Hance to catch up with that we need to write the route path in the route file so for that open the route file /routes/api.php and it will look like this after adding the code in it.
<?php

use Illuminate\Http\Request;
use Illuminate\Support\Facades\Route;

Route::resource('posts', 'App\Http\Controllers\PostController');

// Route::middleware('auth:api')->get('/user', function (Request $request) {
//     return $request->user();
// });
Step 6: Create PostController file
Run the below command in the terminal to create the controller file for Laravel 8 and vue.js Single-page CRUD Application SPE.
php artisan make:controller PostControllerThis will create the controller file at app/Http/Controllers/PostController.php and after added the function it will look like this.
<?php

namespace App\Http\Controllers;

use Illuminate\Http\Request;
use App\Models\Post;

class PostController extends Controller
{
    /**
     * Display a listing of the resource.
     *
     * @return \Illuminate\Http\Response
     */
    public function index()
    {
        $posts = Post::all();
        return response()->json($posts);
    }

    /**
     * Show the form for creating a new resource.
     *
     * @return \Illuminate\Http\Response
     */
    public function create()
    {
       //
    }

    /**
     * Store a newly created resource in storage.
     *
     * @param  \Illuminate\Http\Request  $request
     * @return \Illuminate\Http\Response
     */
    public function store(Request $request)
    {
        $post = new Post();
        $post->title = $request->title;
        $post->body = $request->body;
        $post->save();

        return response()->json(['message'=>"Saved Succesfully!"],200);
    }

    /**
     * Display the specified resource.
     *
     * @param  int  $id
     * @return \Illuminate\Http\Response
     */
    public function show($id)
    {

        $post = Post::find($id);
        return response()->json($post);
    }

    /**
     * Show the form for editing the specified resource.
     *
     * @param  int  $id
     * @return \Illuminate\Http\Response
     */
    public function edit($id)
    {

    }

    /**
     * Update the specified resource in storage.
     *
     * @param  \Illuminate\Http\Request  $request
     * @param  int  $id
     * @return \Illuminate\Http\Response
     */
    public function update(Request $request, $id)
    {
        $post = Post::find($id);
        $post->title = $request->title;
        $post->body = $request->body;
        $post->save();

        return response()->json(['message'=>"Updated Successfully!"],200);
    }

    /**
     * Remove the specified resource from storage.
     *
     * @param  int  $id
     * @return \Illuminate\Http\Response
     */
    public function destroy($id)
    {
        $post = Post::find($id);
        $post->delete();
        return response()->json(['message'=>'Deleted Successfully!!'],200);
    }
}
Here I have added the functions for index(), store(), show(), update() and destroy().
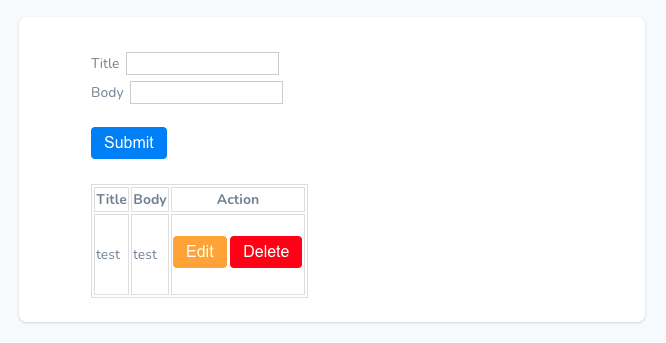
Here we are done with code and now it’s time to refresh the home page and it will look like this.

However in the above form when you enter the title and body it will quickly populate in the below table with the edit and delete button.
From the above form when you press the edit button it will populate the data in the fields and you can edit from here and update it.
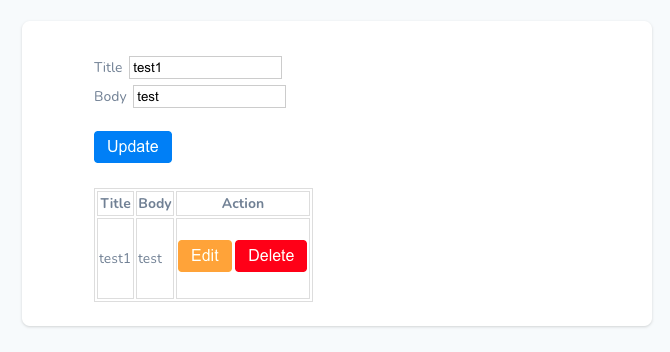
The same method goes for the delete button it will delete that record when getting clicked.
Now you are done with the Laravel 8 and vue.js Single-page CRUD Application SPE. Enjoy learning vue js with laravel.