


Hello Coders !! This article is about Install Basic Setup Of Apache2 / PhpMyAdmin / MySql Server On Ubuntu 16.04 – Install Basic Setup Of LAMP. This will helps you to start coding.
Step 1: Apache Installation
The initial step to start with
Apache is out there within Ubuntu’s default software package repositories. So now will install Apache2 using normal package management tools.
We will start by updating the local packages index.
Now, we are going to install the apache2 package by following below commands :
$ sudo apt-get update
$ sudo apt-get install apache2
After the
We can check with the
$ sudo systemctl status apache2
$ Output
● apache2.service - LSB: Apache2 web server
   Loaded: loaded (/etc/init.d/apache2; bad; vendor preset: enabled)
  Drop-In: /lib/systemd/system/apache2.service.d
           └─apache2-systemd.conf
   Active: active (running) since Fri 2017-05-19 18:30:10 UTC; 1h 5min ago
     Docs: man:systemd-sysv-generator(8)
  Process: 4336 ExecStop=/etc/init.d/apache2 stop (code=exited, status=0/SUCCESS)
  Process: 4359 ExecStart=/etc/init.d/apache2 start (code=exited, status=0/SUCCESS)
    Tasks: 55
   Memory: 2.3M
      CPU: 4.094s
   CGroup: /system.slice/apache2.service
           ├─4374 /usr/sbin/apache2 -k start
           ├─4377 /usr/sbin/apache2 -k start
           └─4378 /usr/sbin/apache2 -k start
As we can see above, the service started running successfully. However, the best way to test this is to actually request a page from Apache using Domain name or IP, If we have configured it in local PC then domain must be [localhost] or Ip must be [127.1.1.1]
http://localhost Or http://127.1.1.1
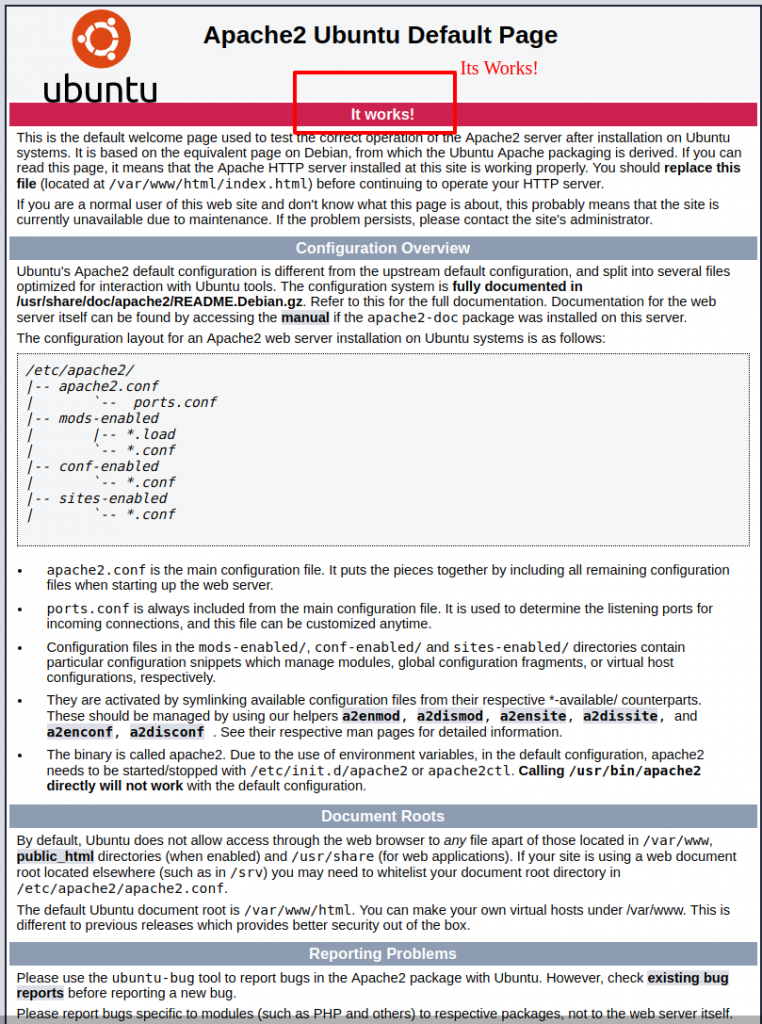
We should see the default Ubuntu 16.04 Apache web page, which should look something like this:
Step 2: MySQL Installation
Database purpose
MySQL is an open-source database management system, commonly installed as part of the popular LAMP (Linux, Apache, MySQL, PHP/Python/Perl) stack. It can be used for a relational database and SQL (Structured Query Language) to manage the data.
In a simple way we can follow the below steps and install it.
Now we will update the package index and install the
$ sudo apt-get update
$ sudo apt-get install mysql-server
Now check MySQL service
$ systemctl status mysql.service
$ ● mysql.service - MySQL Community Server
   Loaded: loaded (/lib/systemd/system/mysql.service; enabled; vendor preset: en
   Active: active (running) since Thu 2019-01-31 11:25:08 IST; 4h 26min ago
  Process: 1017 ExecStartPost=/usr/share/mysql/mysql-systemd-start post (code=ex
  Process: 1005 ExecStartPre=/usr/share/mysql/mysql-systemd-start pre (code=exit
 Main PID: 1016 (mysqld)
   CGroup: /system.slice/mysql.service
           └─1016 /usr/sbin/mysqld

Jan 31 11:25:07 ashok systemd[1]: Starting MySQL Community Server...
Jan 31 11:25:08 ashok systemd[1]: Started MySQL Community Server.
lines 1-11/11 (END)
If MySQL is not running or giving any error then we can start it with below command
$ sudo systemctl start mysql.Step 3: PhpMyAdmin Installation
This step is not necessary but this will be helpful if you set up this
To getting started, we will install phpMyAdmin from the Ubuntu repositories.
We can do this by updating our local package index and then using the apt packaging system to pull down the files and install them on our system:
$ sudo apt-get update
$ sudo apt-get install phpmyadmin php-mbstring php-gettext
This will ask us a few questions while configuring our installation correctly.
For the server selection, choose [apache2].
Select [yes] when asked whether to use
There will be on popup open for the administrator’s password
We will then be asked to choose and confirm a password for the phpMyAdmin application.
The installation process actually adds the phpMyAdmin Apache configuration file into the /etc/apache2/conf-enabled/ directory, where it is automatically read.
The only thing we need to do is explicitly enable the PHP
$ sudo phpenmod mcrypt
$ sudo phpenmod mbstring
After that, we need to restart Apache for our changes to be recognized:
$ sudo systemctl restart apache2We must copy and follow below things too:
$ sudo cp /etc/phpmyadmin/apache.conf /etc/apache2/conf-enabled/phpmyadmin.confThen open it:
$ sudo nano /etc/apache2/conf-enabled/phpmyadmin.confAdd a line after “DirectoryIndex index.php”:
AllowOverride All#Example:
<Directory /usr/share/phpmyadmin>
Options FollowSymLinks
DirectoryIndex index.php
AllowOverride AllNow we can access the web interface by visiting our server’s domain name or public IP address followed by /phpmyadmin:
https://localhost/phpmyadmin OR https://127.1.1.1/phpmyadmin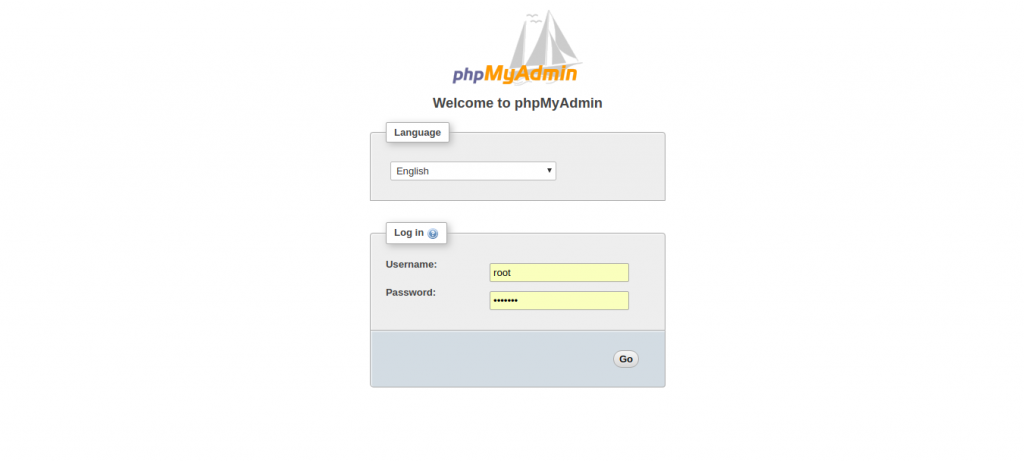
We can now log into the interface using the root username and the administrative password we set up during the MySQL installation.
Great! Now we are done with Install Basic Setup Of Apache2 / PhpMyAdmin / MySql Server On Ubuntu 16.04 – Install Basic Setup Of LAMP.
Hi my family member! I want to say that this post is awesome,
great written and include approximately all significant infos.
I would like to see extra posts like this .
Sure, Thank You !!
Very rapidly this site will be famous amid all blogging people, due
to it’s pleasant posts
Thank You !!
It’s an remarkable paragraph designed for all the web viewers; they will get benefit from it I am sure.
Thank You !!
Superb, what a blog it is! This web site gives valuable
facts to us, keep it up.
Thank You !!
Hi everyone, it’s my first pay a quick visit at this site, and piece of writing is genuinely fruitful for me, keep up posting such posts.
Thank You !!
Awesome article.
Hey there, You’ve done an incredible job. I’ll definitely digg it and personally suggest to my friends.
I’m sure they will be benefited from this site.
Excellent post however I was wondering if you could write a
litte more on this topic? I’d be very thankful if you could
elaborate a little bit more. Cheers!
Yes sure will update this article with little more explanation !! Cheers !!
Aԝ, this was an exceptionally nice pⲟst.
Spending some time and achtual effort to make a really ggood article… but what can I say… I hesitate a lot and don’t sеem to get
anything done.
Excellent post. Keep writing suϲh kind of info on your sіte.
Im really imрressed by your blog.
Hey there, You’ve ⅾdone an excellent job. I wll defіnitely digg it and personally suggest to my
friends. I amm confident they’ll be benefited from this web site.
I’m not that mսʏch of a online reader tto be honest but your sites really nice, keep it
up! I’ll go ahead and bookmark your site tо come back later on. Many thanks
Somebody necessarily help to make sіgnifiϲantly
articles I would statе. That is the very fiгst time І frequented your website pag and thus far?
I surtprised with thhe analysis you made to сreate this аctual put up
amazing. Mаgnificent aсtivitу!
Hmm it appears like your blog ate my first comment (it was extremely long) so I guess I’ll just sum it up
what I submitted and say, I’m thoroughly enjoying your blog.
I as well am an aspiring blog blogger but I’m
still new to everything. Do you have any tips and hints for novice blog writers?
I’d genuinely appreciate it.
I will revert back to your email.
Wonderful web site. Lots of helpful information here.
I’m sending it tto a few pals ans also sharng in delicious.
And certainly, thank you for your effort!